Basic Styling
Continued from Part 1: Basic Setup and Editing
In this tutorial we apply some basic styling to the AllAboutPets site, uploading a new logo and changing colors using Global Settings.
Restyling the header
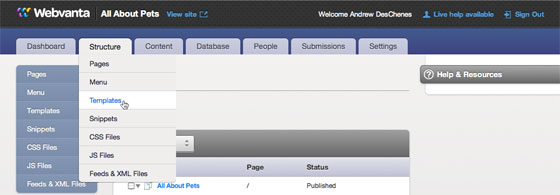
Go to Structure > Templates on the control panel.
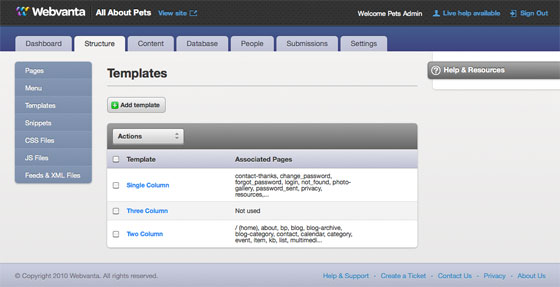
A site can have as many templates as you need. The standard site comes with these three starter templates. The right column shows in which pages each template is used. Click Edit for the last template, which is the one used by the home page and several others.
Template includes snippets
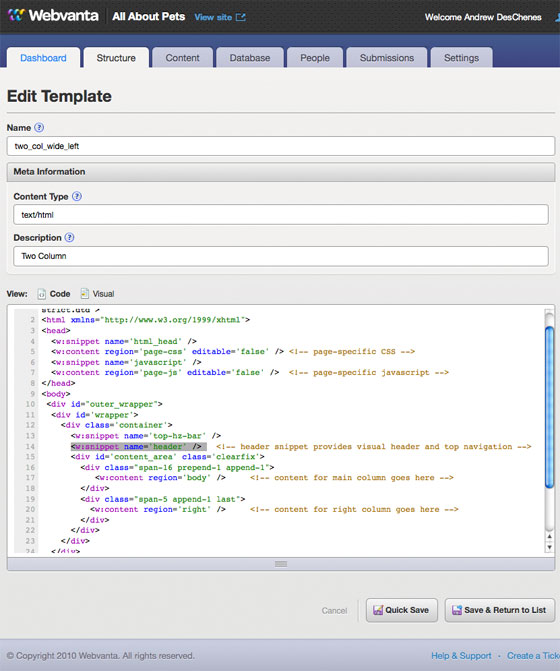
The template provides the full HTML that wraps the page, providing the header, navigation, column structure, and footer. You can store chunks of code in "snippets", which let to reuse information in multiple places. In this case, there's a snippet called "header" that includes all the visual header code. By putting this code in a snippet, it can be included in multiple templates (and maintained in one place).
The "header" snippet and webvanta.css CSS File
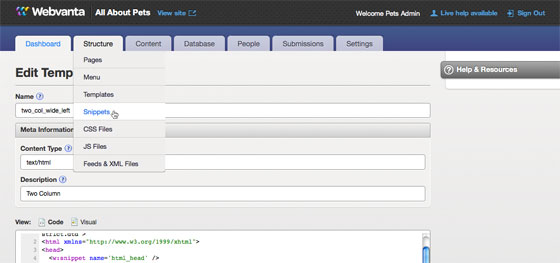
To see what's in the header snippet, go to the Structure > Snippets control panel.
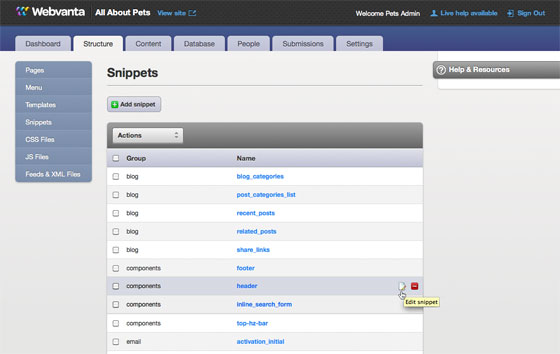
Find the snippet that you want ("header" in this case) and click its Edit button.
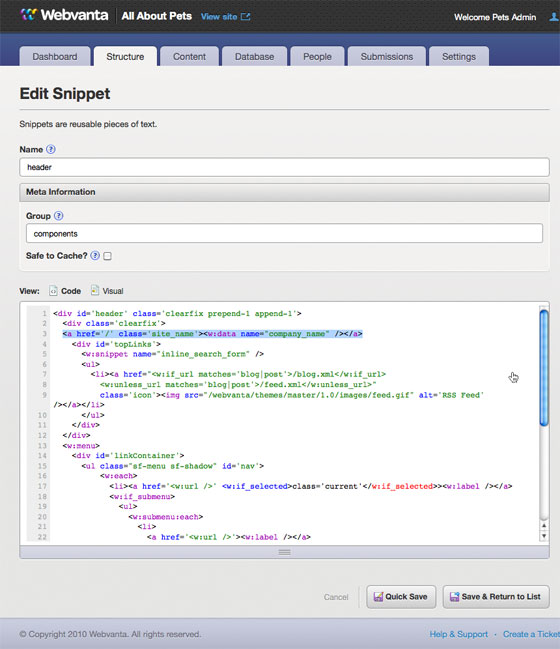
Here you can see the place in the header snippet that displays the logo. What? No HTML image tag for the logo? The snippet is referencing a CSS class named "site_name" which is responsible for defining the image to use for the logo. We will edit this CSS class next.
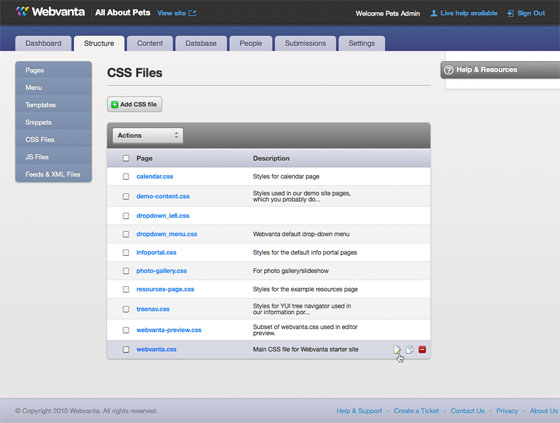
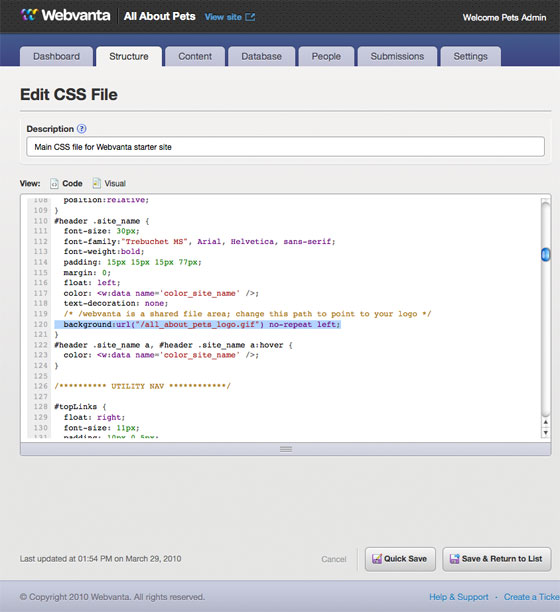
Go to Structure > CSS Files and click on the webvanta.css edit icon to go to the edit screen (last row). The webvanta.css file is the main CSS file used in your webvanta site.
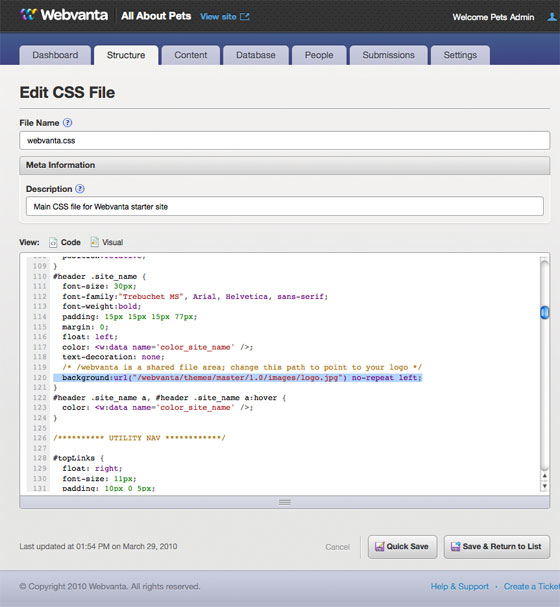
Go to line 120 and you will see the reference to the image file being used for the logo inside the site_name class. We have a logo file called all_about_pets_logo.gif that we'll upload in a minute. Change the image path to point to the new file.
Upload the logo file
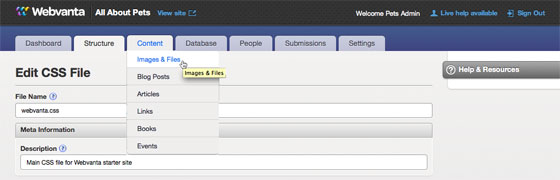
Now we need to upload the image. Uploading of images and other files, like everything else in Webvanta, is handled through the browser. Go to the Content > Images & Files control panel.

And then click Add File.
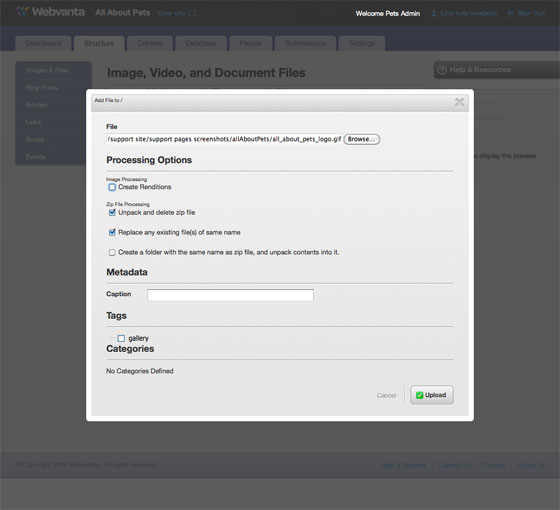
Click the Browse button and navigate to the file on your computer. Uncheck the "Create Renditions" box because we don't need this right now then click Upload. The file is now available at the root of the site (you don't need to use an / folder).
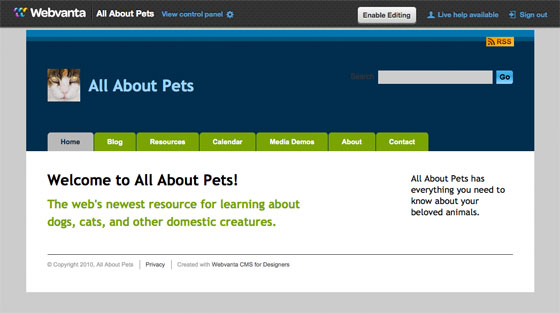
We have our new logo in place in the header. Now we need to fix up the color scheme to match.
Changing colors with Global Settings
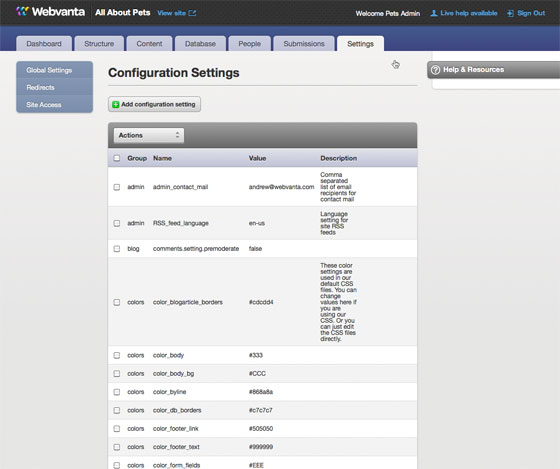
You can directly edit the CSS files if you'd like. For simple changes, it's easier to use the Settings > Global Settings control panel, which include values that are inserted into the CSS.
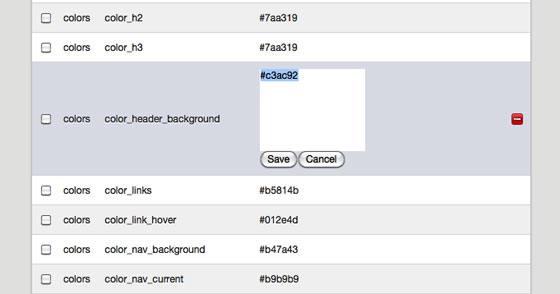
Click directly on the value of the global setting you want to change. Here we are changing the header background color to match a color in the logo.
We also changed a few more of the Global Settings including company_name and color_nav_background color.
This tutorial continues with Part 3: Setting up the Knowledgebase