A Custom Database
Continued from Part 3: Setting up the Knowledgebase
In the previous part of this tutorial, we set up the Knowledgebase to store our links to other resources from around the web, organized into categories and types. Often, though, your site needs to organize and present some information that is particular to your subject material, and you need custom database fields.
In this tutorial, we'll set up a database for breeds, with just the fields we need.
Creating our own Breeds database
So far, we've used the off-the-shelf knowledgebase capabilities. But like any topic, information about animals has its own structure, and we'd like to reflect that structure in our database and web site. In particular, for dogs and cats, we'd like to have our own database of breeds. What we need is, in the Webvanta system, a custom item type.
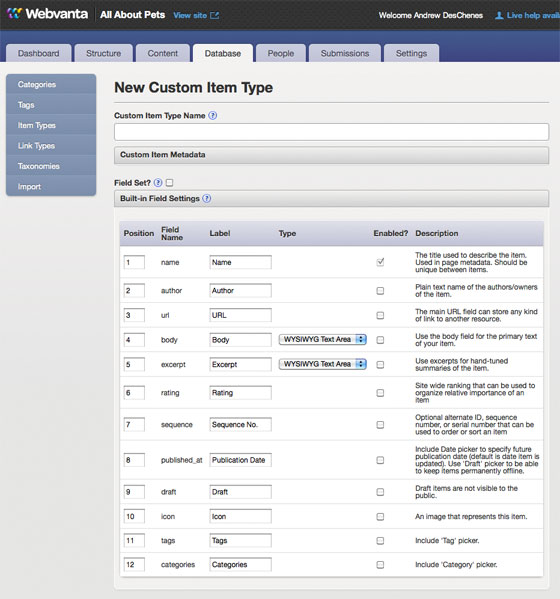
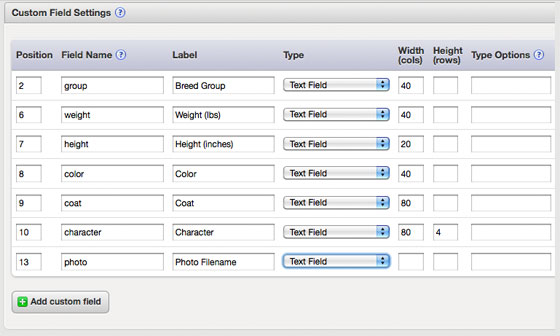
Click Database > Item Types then click the Add Custom Item Type button. You can create as many custom item types as you'd like. There's a standard set of fields, shown here, that you can decide to include or not, and you can customize how they are labeled and the order in which they are shown in forms.
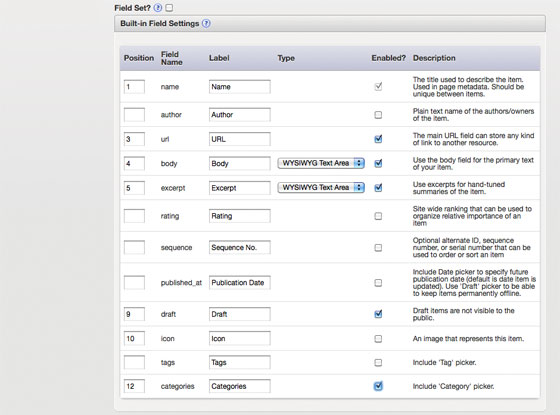
In this case, we don't need an author field, nor one for rating or publication date, and we're going to ignore tags for now for simplicity.
You can add as many custom fields as you'd like.
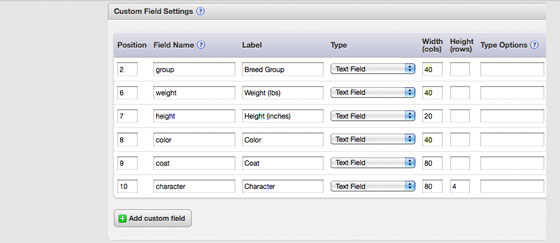
Custom fields are most commonly either simple text fields, or text areas. (Other more advanced types are available as well.) These fields complete our Breed item type definition.
Click the green Add Item icon which appears when you mouse over the breed row. from the Custom Item Types list to add the first breed. (Webvanta has also automatically added a Breed drop-down menu item in the Content menu.)
Adding a breed
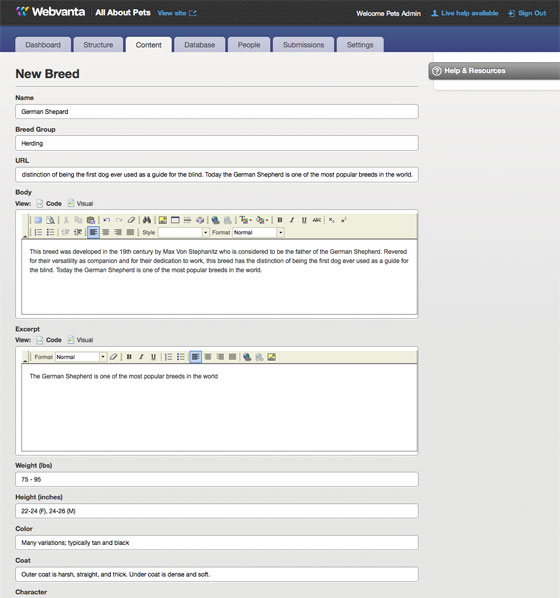
Webvanta automatically created this New Breed form from the information we entered on the custom item type form. We'll add a couple of breeds into the database.
Displaying the database contents
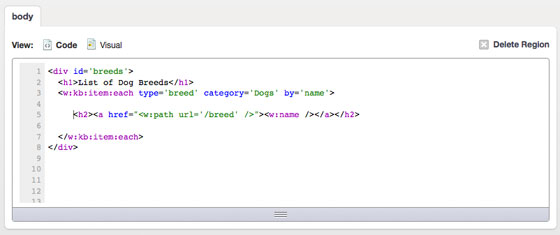
Here's the code in the screenshot above:
<div id='breeds'>
  <h1>List of Dog Breeds</h1>
  <w:kb:item:each type='breed' category='Dogs' by='name'>
     <h2><w:name /></h2>
  </w:kb:item:each>
</div>
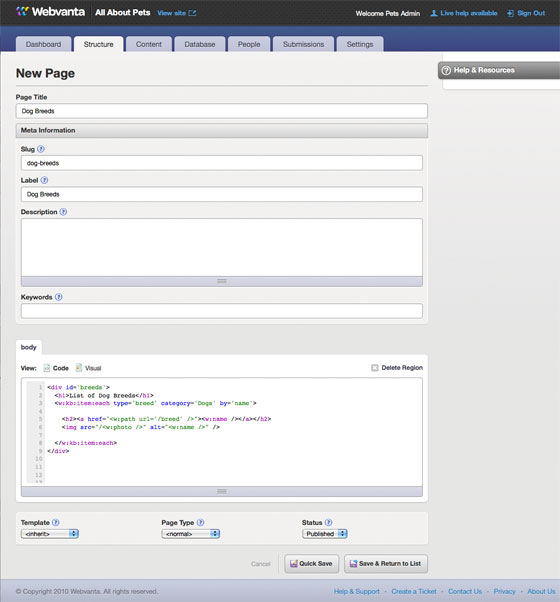
Now we need to create a page to view the database contents. Click Structure > Pages then click the Add Page button.
Adding the Dog Breeds page to the menu
Click Structure > Menu then drag the page to the desired position in the right-hand menu section to add it to the site's navigation bar.
Our basic breed list
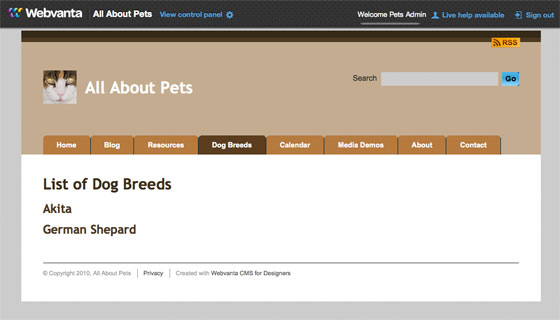
It works! These are the two breeds we entered into the database.
Adding a link to the Breed page
Here's the code in the screenshot above:
<div id='breeds'>
  <h1>List of Dog Breeds</h1>
  <w:kb:item:each type='breed' category='Dogs' by='name'>
     <h2><a href="<w:path url='/breed' />"><w:name /></a></h2>
  </w:kb:item:each>
</div>
Now let's make the list more useful by making the name into a link to the "Breed" page. The w:path statement provides the path to this special page, and Webvanta automatically embeds in the generated URL the ID of the specific breed to be displayed. We're going to use a page with the slug of "breed" for the breed page, so we specify the URL for that page here.
Creating the Breed page

Here's the code in the screenshot above:
<w:kb:item>
  <h2><w:name /></h2>
  <h3><strong>Group: </strong><w:group /></h3>
  <p><w:body /></p>
  <p><strong>Colors: </strong><w:color /></p>
  <p><strong>Coat: </strong><w:coat /></p>
  <p><strong>Height: </strong><w:height /></p>
  <p><strong>Weight: </strong><w:weight /></p>
  <p><strong>Character: </strong><w:character /></p>
</w:kb:item>
We have our Dog Breeds page already, which lists all the breeds; now we need the Breed page, which provides all the information for a single breed. We'll use a special Page Type, "Item", which provides two important special behaviors. First, the item page will automatically extract the item ID from the URL, so it knows which item to select (this ID is automatically inserted by the w:path statement on the Breeds page). Second, the page title, descriptions, and keywords aren't specified for the page itself (which is why they're left blank above), but are automatically inserted from the SEO fields for the selected item.
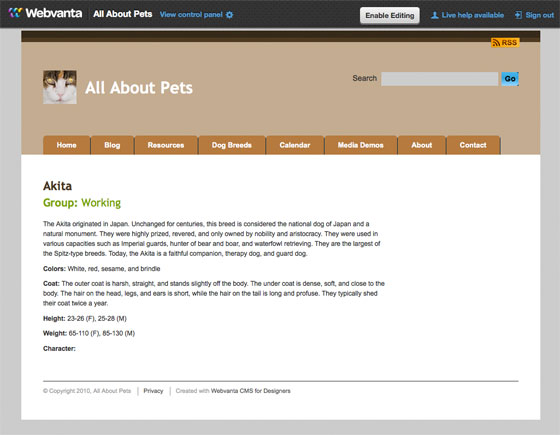
Here's our initial Breed page for the Akita.
Adding a photo
Let's add a photo of each breed. Edit the custom item type we created earlier and add a text field called "photo".
Upload the photos
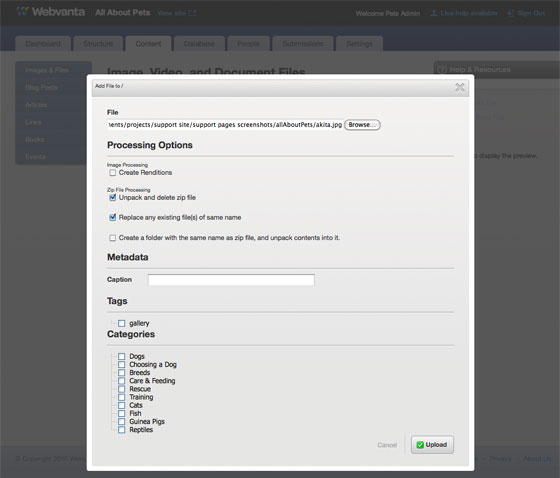
Just as we did earlier for the logo, we upload the pictures for each of the breeds. Note that you can combine as many files, and even folders, as you want into a zip, and when you upload it Webvanta will unpack it into its components.
Linking the photos to the database
Now we need to edit the breeds so the system knows which photo goes with which breed.
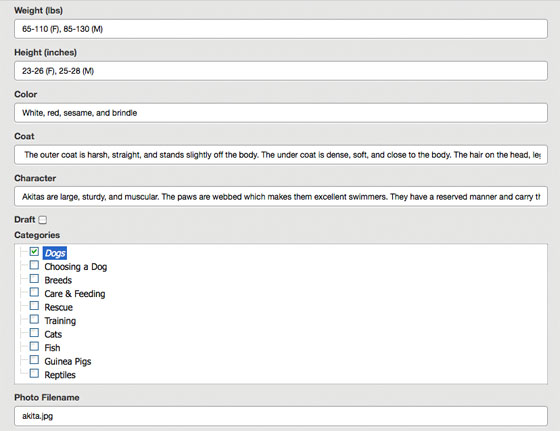
Since we added a filename field when we edited the custom item type definition, that field is now there for us to fill in on the edit screen for each breed.
Adding the photo to the Breed list page
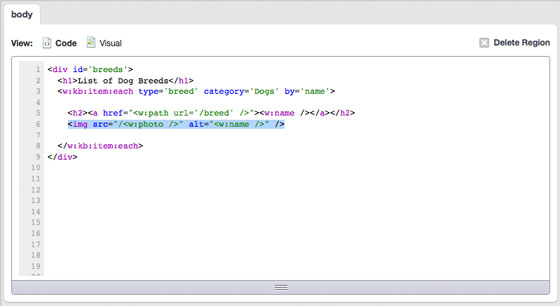
Here's the code in the screenshot above:
<div id='breeds'>
  <h1>List of Dog Breeds</h1>
  <w:kb:item:each type='breed' category='Dogs' by='name'>
    <h2><a href="<w:path url='/breed' />"><w:name /></a></h2>
    <img src="/<w:photo />" alt="<w:name />" />
  </w:kb:item:each>
</div>
Go to Structure > Pages and click on the Dog Breeds page we created earlier (you can also use in-place editing). To display the image, we just add an img tag with src attribute set from the photo field that we added to the database. We can use the name to automatically provide the alt attribute.
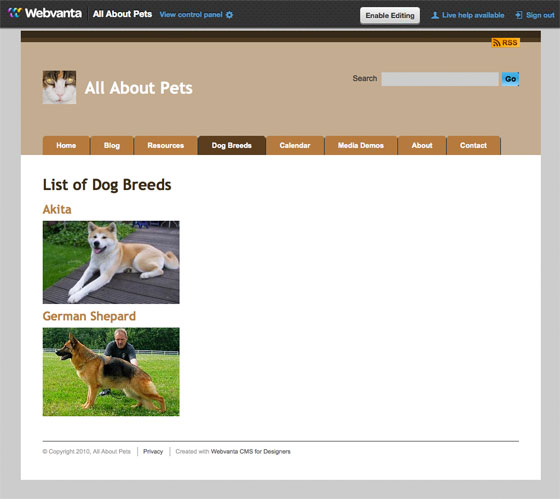
The breeds page, with photos!
Adding the photo to the breed page
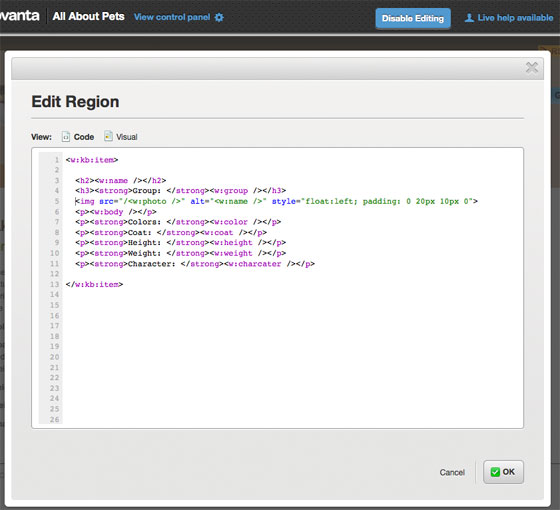
Here's the code in the screenshot above:
<w:kb:item>
  <h2><w:name /></h2>
  <h3><strong>Group: </strong><w:group /></h3>
  <img src="/<w:photo />" alt="<w:name />" style="float:left;  padding: 0 20px 10px 0">
  <p><w:body /></p>
  <p><strong>Colors: </strong><w:color /></p>
  <p><strong>Coat: </strong><w:coat /></p>
  <p><strong>Height: </strong><w:height /></p>
  <p><strong>Weight: </strong><w:weight /></p>
  <p><strong>Character: </strong><w:character /></p>
</w:kb:item>
Using in-place editing this time by clicking the Enable Editing button while we are on the Breed page, add the same img tag as we used for the list page, inserted wherever you want with the other information. We've added an inline style to position it (it would be better to do this in your CSS file).
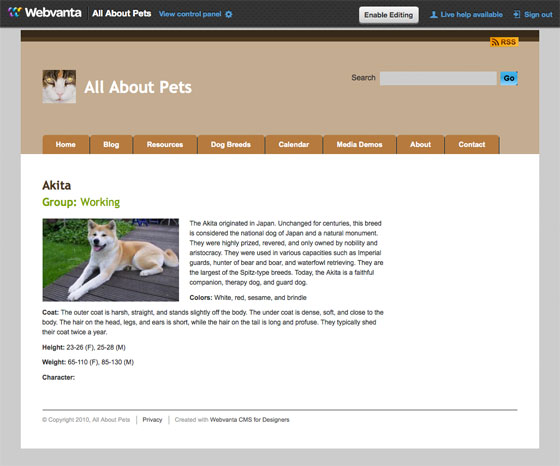
And here is the breed page, complete with photo.